Sunday, November 20, 2011

Almost White Castle Sliders


Let's be honest here - I could eat White Castles for breakfast, lunch and dinner. I've been enchanted with White Castle ever since I had my first slider sometime around 1980 when I ate 20 of them in a single sitting. The Drum & Bugle Corps I was traveling with stopped at a WC and a friend bet me that I couldn't eat a "tall sack". Well, 20 cheeseburgers later I had an army of empty slider boxes and a bit of a sick stomach, but I kept them down and earned $20 bucks on the bet (thanks Nanook!).

Most people cringe at the thought of eating White Castle at any other time of day than 2:00 in the morning after the bars close down. To me, they are an anytime treat. Today, I took my 2 girls to WC in Algonquin, IL and we enjoyed a slider lunch. Later this afternoon, I decided to try my hand at a homemade slider while my earlier lunch was still fresh in my mind. I've browsed a few recipes claiming to replicate the signature White Castle slider, but I could tell from reading them that none them were even close. Just because a hamburger is thin, tiny and has onions does NOT mean that it tastes anything like a White Castle burger. I've probably eaten 100's, if not close to a thousand, sliders over the last 30 years. I've intently watched them grill the delicious burgers from the customer side of the counter and I've savored every one of them. So with that being said, here's my take on a very close to White Castle slider recipe and cooking technique, as well as a few ideas about what I'll do differently next time. It's really pretty basic.

First, the hamburger. I'm using one pound 80/20 ground chuck. Dash of coarse kosher salt and some fresh ground pepper, one egg white. Mix and smoosh together this ground beef very well by hand (about 3 - 5 minutes) until the consistency gets smooth and everything stays firmly together. Layout a sheet of waxed paper. Take about 1/4 of the ground beef and flatten it onto the waxed paper. Put another layer of waxed paper on top of it and gently flatten to a very thin sheet with a rolling pin. It needs to be about as thin as you can get it without the sheet of meat starting to tear apart. It will be about 1/16" thin, seriously. Next, I used a sharp knife to score the meat into squares. These should be about 1/4" larger than the circumference of your bun (we'll talk about buns later -wink wink-). Here's what it looks like:


Next, finely dice/mince a small - medium yellow onion. These pieces of onion should be very small. Then, heat a skillet to medium-low heat. Don't go too hot. If anything, start low and kick it up a little bit if you need to. Splash a small amount of cooking oil in the pan and then add a layer of diced onions, such as:


Now, carefully place your square burger slices on top of the diced onions.


Okay, now that you've gotten this far - HERE IS THE MAGIC KEY TO GIVING THEM THE TEXTURE AND FLAVOR OF A REAL WHITE CASTLE SLIDER!! No other recipe I've seen on the Internet shows this or even mentions this. You MUST cook the burgers with the buns on top of them! I guess now it's time to talk about the buns. I bought these at the Jewel on a whim yesterday and then decided to make some homemade sliders. They are made by Pepperidge Farm (here's a link to their product page)

Separate the top and bottom bun halves, and place the BOTTOM bun directly on top of the as-of-yet uncooked burger slice - inside of the bun facing down. Looks like this:


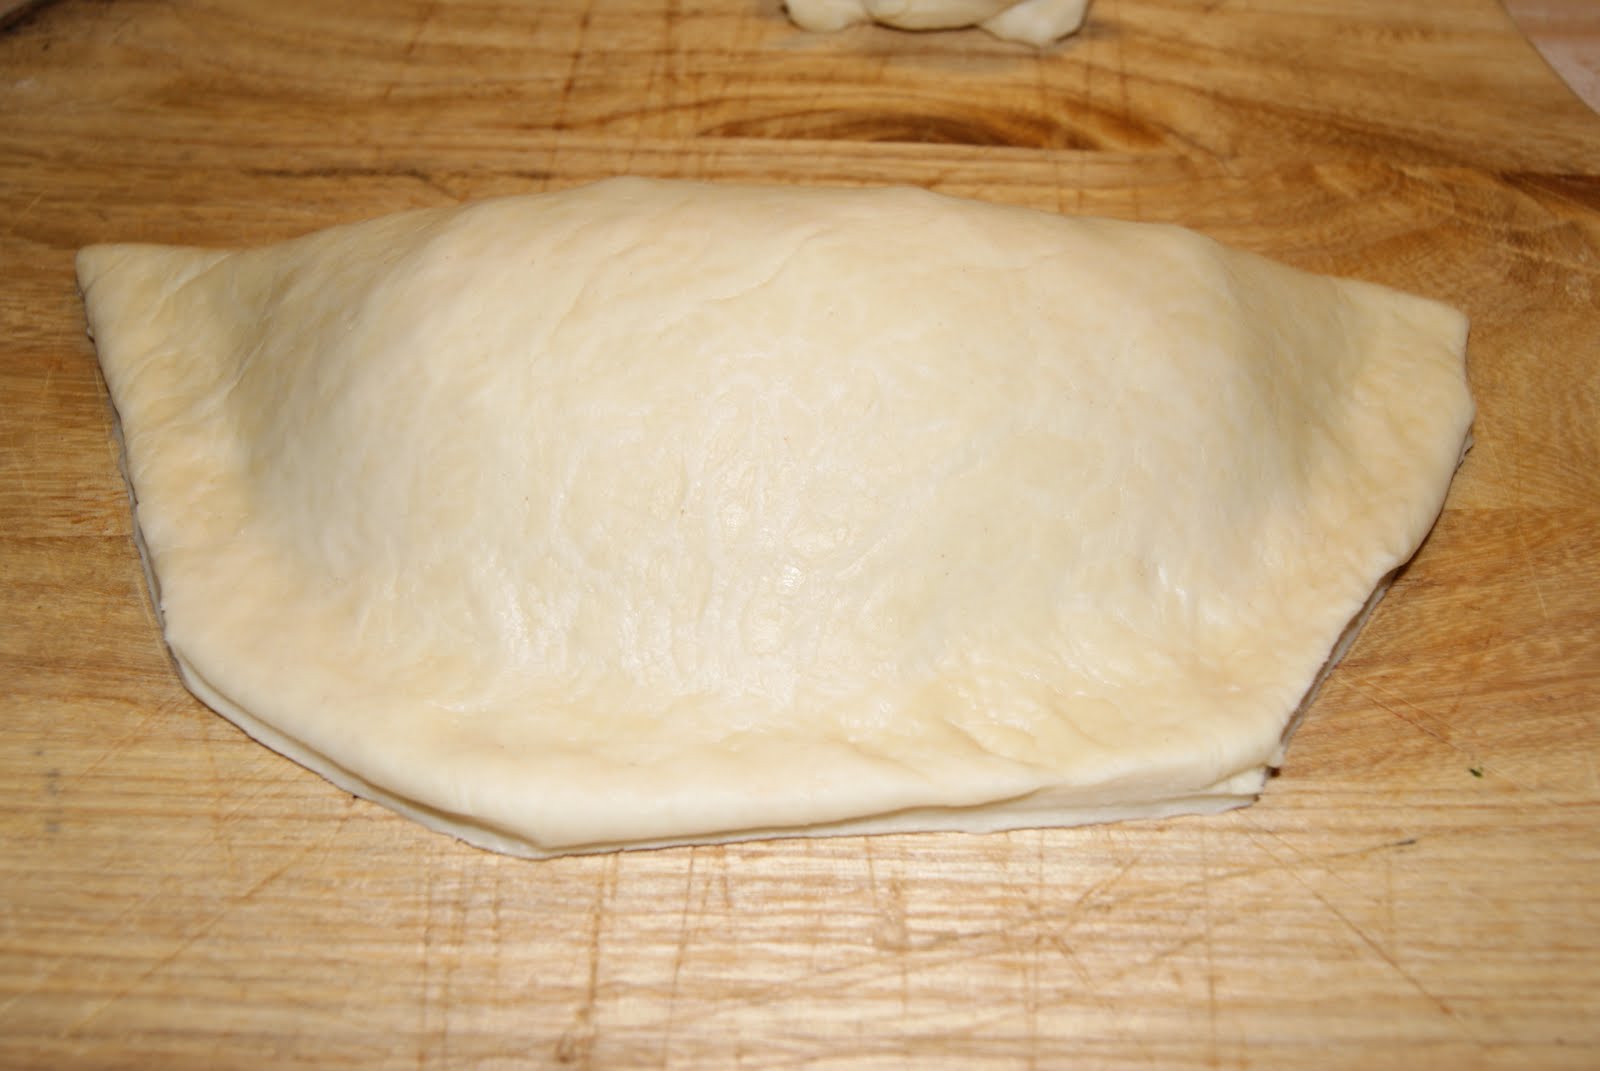
Then put the top half of the bun on top of the bottom bun, again inside facing down. Looks like this:


To ensure there is enough steam and heat to fully cook the burger slice and soften the onions, I put a lid on top of it all and allowed the steam to mingle all the flavors together during the cooking process. Again, these burgers cook through steam heat, not by sizzling on a hot grill/skillet. The juices from the cooked burger will be absorbed and retained by the bun that's sitting on top of them. That is why the slider is called a slider! Without this, it will taste dry and lifeless. Trust me.


They don't take very long to cook. Only a few minutes, but I probably cooked them for about 5 minutes under pretty low heat just to make sure they were thoroughly cooked through. They were. Now, onto the assembly. Using a spatula, take out the whole she-bang - onion, burger, bun and then place upside down on a plate so that the burger is facing upwards. It's gonna look like this (note the tender, delicious looking burger/bun *entity*)


Every burger gets a dill pickle slice. These are simply Vlasic dill sandwich slices.


Next, if you want cheese, use a half slice of processed American cheese and then cover with the top bun. A whole slice is way too much for me and would overwhelm the slider, in my opinion. The heat of the cooked burger and bottom bun will easily melt the cheese. There is no need to put cheese on these while they are cooking in the pan (another nuance that no one else who posted a recipe seems to grasp). Here's the assembled slider - cut in half so you can see a cross sectional view:


So that's all there is to it. What will I do differently the next time I make these? Couple things. After the onions are diced, I'll give them a light rinse in cold water. That will wash away some of the very strong onion juice and mellow out the cooked onion flavor just a little bit. Plus, the residual water will create some extra steam for cooking. Regarding the burger slices, I think I will make these ahead of time and then freeze them. In the restaurant, they cook the burgers from frozen on top of the onions on a flat-top grill. I will try this, as I'm sure it changes the taste and texture.

If you decide to try this yourself, please leave a comment and let me know how you liked it and feel free to post questions or send me email at ChefJohnnyChicago @ gmail.com. Thanks for reading! Stay tuned and stay hungry, my friends. Until next time...

Thursday, June 9, 2011

Panzarotti Paparazzi

* Exclusive Photos of Panzarotti *


Okay, this has nothing to do with celebrity paparazzi, but it kind of sounds like panzarotti. Panza-wuht?? I had no idea what this was until I moved to Chicago in 1986 and had my first panzarotti (or panzerotti in Italy) from D'Agostino's [website] at Addison and Southport. Panzarotti are very similar to a calzone's ingredients and preparation, except a calzone is baked in an oven. Panzarotti are deep fried in oil which gives the dough a deliciously crispy texture and taste similar to an empanada, doughnut or a funnel cake. Here's my attempt at a Chicago-style panzarotti. I will be stuffing it with Italian meatballs rather than the classic pepperoni, sausage, onion and green pepper. Unfortunately, these can't be prepared as a spur of the moment or as late nite munchie.

But for all you Windy City expatriots who are craving a panzarotti in that barren wasteland of non-Chicago food choices you have, consider investing some time to make these for a special occasion:

---> Click any photo for larger version <---

1. Dough. About 8 oz. of fresh pizza dough to be more precise.


2. Marinara. Prepared using Escalon 6-in-1 ground tomatoes as the base.


3. Sliced Italian meatballs. Mama Dispirito's recipe. Best meatballs ever. Beef, pork, veal, garlic, onion, fresh parsley, love - delicious!


4. Part-skim Mozzarella Cheese


6. Fold dough in half over the filling ingredients. Firmly press dough together around the edges to form a pocket.


7. Trim excess dough (optional)


8. Roll and pinch edges together to ensure a tight seal. You don't want any filling to leak out or oil seeping into the dough pocket during cooking.


9. Vegetable oil heated to 360 degrees in a deep pot. Panzarotti should float on top of hot oil. If it doesn't, then either your oil is not hot enough or your oil is not deep enough.


10. Cook for about 3 minutes. Check for golden brown underside and then flip it.

Cook for about another 3 or 4 minutes. Check for golden browness and then carefully remove from oil and set on paper towel to cool slightly.

12. Shake of grated parmesan. You can also serve with a side of marinara for dipping the crusty, crispy edge pieces, however I find that the marinara filling is more than adequate. This is far from dry and bready once you cut into it.


13. Enjoy and behold all of the flaky, crispy, golden brown, deep fried goodness that is the Panzarotti.


Thanks for reading! Please let me know if you want any of the recipes mentioned in this post and I'll send you the very latest version. I refine my favorite recipes all the time and so I'd rather not publish them and then worry about having to update them as changes are made. Until next time...

Monday, January 24, 2011

Thin, Crunchy, Cracker Crust Pizza


It's been too long since I've updated my foodie blog. I've felt a bit guilty about that, but truth is I haven't been very inspired cooking-wise over the last couple months. Today was the "Big Game" between the Bears and Packers, so I decided shake off the funk and do it up by making traditional game day grub - pizza and wings.

I've always enjoyed the really thin, almost cracker crust pizza. Today I think I've nailed it. I mixed the dough yesterday and let it rest overnight. Here goes the assembly and finished product.

First, I roll out the dough very, very thin using a French-style wooden rolling pin used primarily for pastry:


Next, I use my fancy dancy dough docker to perforate the dough to reduce the air pockets that will develop in the crust when it bakes.


Now, create a small rim around the edge by folding over and pinching the dough together:


Finally getting the opportunity to use the pizza screen I bought at a restaurant supply down in Nashville. This will allow air to circulate under the crust and get it that much more crispy:


Feeling Saucy! Today I'm using "Tomato Magic - Ground Tomatoes" packed by Stanislaus Food Products in California. Tomato Magic and 7/11 Ground Tomatoes are used by most of the important Chicago pizzerias. I've added Mediterranean dried oregano flakes, ground black pepper, fresh crushed garlic, dash of onion powder and some olive oil as well as a couple secret spices. No extra salt! These sweet and tasty tomatoes already have some salt added as well as citric acid. Your tongue can confuse citric acid as salty, so adding any additional salt will kill these tomatoes.


Spread the sauce out towards the edge with the back of your ladle in expanding circles.


Now add the meat toppings. Just pepperoni today. And yes, in Chicago the meat toppings go UNDER the cheese.


Finish it off with shredded mozzarella and a couple pepperoni slices on top for garnish, plus a light shake of grated parmesan cheese.


Into the oven that's been heated to 450 degrees for 1/2 hour. I put the screen directly on the baking stone which will radiate heat directly into the bottom of the crust very similar to a deck oven.


12 minutes later, pizza is fully baked.


Thin, crispy, crunchy yet tender slices of pepperoni pizza goodness!


Stay tuned and stay hungry, my friends. Next post will be Buffalo-style Hot Wings!

~ Johnny

Sneak Peek "Appeteaser"

Thursday, July 22, 2010

Grilled Sheboygan Brats

You would imagine that while visiting the bratwurst capital of world - Sheboygan, Wisconsin - that actually finding brats would be as easy as stumbling around whilst inebriated on Milwaukee's Beast Ice beer, however it wasn't *that* easy, as I found out yesterday. We had just finished up a wonderful overnight family get-away at the Blue Harbor Resort, but before we left town I was bound and determined to bring home some "real deal" brats.

So here's how it went down...
I started off by cruising up and down some of the main streets downtown and around the harbor area. Didn't see much except a very quaint, historic, lakeside harbor town and Larry's Hi-Lo Bakery on 8th street. So I resorted to Google in an attempt to find the best brats in Sheboygan and I wasn't going home without them. After a few red herring links from my search results, I decided I would try to go to the Sheboygan Bratwurst Company. GPS got me to the address listed, but it was a school bus repair facility instead. Looking up more Google links, I saw that someone on Chowhound.com highly recommended Miesfeld's Meat Market, put the address in the ol' Tom-Tom, but when we got there it was a Korean grocery store. WTF?! So I call them on the phone and spoke to a very nice lady who told me where they were currently located, you betcha. We're in business now! On my way for the third try and I did ultimately find success.

Click for full-size image.

I strolled right on up to the meat counter and asked for 8 brats.

Click for full-size images.

They make and sell over a dozen varieties of brats as well as a bunch of other freshly made sausages:

Click for full-size images.

Now, I did feel like I had just gone through a bit of a goose chase over the past hour trying to get me some brats and drove a few miles out of my way to get to this place. However, I was not as despondent as Neil Page and I had a nice little chat with the cashier whose mannerism and voice accent was spot on for Edie McClurg, most notably in this clip:

(NSFW language and LOL warning)


With brats, hard buns and horseradish mustard in the bag - mission was complete and back on the road for the 133 mile drive back home to McHenry. By the time we got home, I decided to save the brat grilling for the next day instead. Today's menu is super simple - brats and corn on the cob. I've grilled a lot of brats and sausages in my lifetime and I've almost always pre-cooked them by boiling them before finishing them on the grill. This time however my instructions were to place them on the grill, no boiling, no cooking in beer, just grill them.

So that's exactly what I did, no arguments here:


Click for full-size images.

I will tell you that they took longer than 7-8 minutes to become fully cooked. These aren't pre-cooked brats, they are made with raw pork and beef. I cook hamburgers longer than 7 minutes, so I was in no mood for rare brats. Total cooking time was about 20 minutes on the lowest burner heat my gas grill is capable of. During the cooking, I prepared some yummy sauteed onions just to point of light caramelization:

And here's the finished product accompanied by horseradish mustard and genuine Larry's Hi-Lo Bakery Brat Buns:


Verdict? Best brats I've ever had, you betcha! ;)

Guten Appetit.

~ Johnny

Oh, by the way, don't burn da brats, try your hand at flippin' dem: